Tools and techniques for detecting hidden leaks behind walls
Hidden leaks behind walls can cause structural damage, promote mold growth, and undermine waterproofing measures if left undetected. This article outlines practical tools and proven inspection techniques to locate concealed leakage, interpret signs such as moisture and condensation, and plan maintenance to limit long-term damage.

Detecting hidden leaks behind walls requires a mix of observation, targeted inspection, and appropriate tools. Early signs can be subtle — a musty odor, discoloration on paint or tiling, or a persistent increase in humidity and condensation near fixtures. Regular maintenance of grout, caulking, and seals around tubs, sinks, and showers reduces the chance of water finding its way into wall cavities. This article reviews mechanical, electronic, and visual techniques to find leakage, how ventilation and insulation affect moisture movement, and practical steps to protect surfaces and materials once a leak is identified.
How does ventilation affect moisture and condensation?
Poor ventilation concentrates humidity and can disguise the origin of leaks. In bathrooms and wet areas, limited airflow and absent or undersized fans lead to condensation on cool surfaces; over time, this can mimic or worsen leakage symptoms. When assessing a suspected leak, note whether damp patches coincide with periods of heavy steam or poor ventilation. Improving airflow with fans or passive vents can lower relative humidity and reduce mildew growth, making active leaks easier to distinguish from condensation-related dampness. Ventilation also helps drying after repairs, reducing the risk of mold colonization behind walls.
What visual signs point to mold, mildew, or hidden leakage?
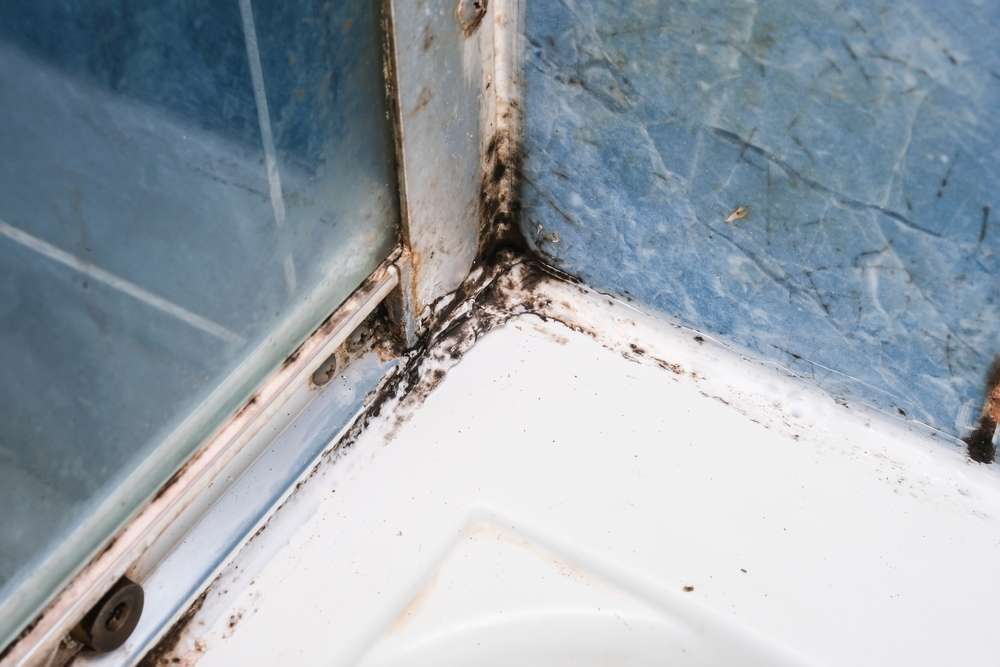
Visible mold, peeling paint, staining on drywall or plaster, and soft or bulging walls are common outward signs. Mildew and mold require moisture to thrive; if growth appears repeatedly after cleaning, this suggests ongoing leakage rather than a one-time condensation event. Check around tiling, grout lines, and fixtures where seals can fail. Look for discoloration spreading horizontally along baseboards or up walls, and note any musty odors. Careful inspection of joints, behind cabinets, and under sinks often reveals moisture paths that originate behind walls.
Which tools reveal leakage and condensation behind walls?
Basic and advanced tools help pinpoint hidden leaks: moisture meters detect elevated moisture content in drywall or timber; infrared (thermal) cameras identify cool spots caused by evaporation or cold water lines; acoustic leak detectors can pick up running water inside cavities; borescopes allow visual inspection through small access holes; and pressure-testing equipment checks plumbing integrity. Use a moisture meter for quick surveys and a thermal camera to narrow areas for more invasive inspection. Combine readings with visual cues and knowledge of fixture locations to determine whether condensation or active leakage is the cause.
How do waterproofing, sealing, grout, and caulking affect leak detection?
Compromised waterproofing and degraded grout or caulking are frequent culprits behind leaks. Sealing failures at joints around tubs, showers, and sinks allow water to bypass tiled surfaces and enter wall cavities. During inspection, test grout and caulk lines for gaps, cracking, or softness. Repairing these materials is as much a diagnostic step as a fix: once grout and sealing are renewed, monitor for recurring dampness to confirm if the leak source was external or internal. Proper materials and techniques for waterproofing are essential to prevent repeat problems and protect insulation and structural materials behind walls.
How can inspection address drainage, fixtures, tiling, and pipework?
Trace drainage routes and inspect fixtures for slow drains, backups, or loose connections that can spray or leak into adjacent wall cavities. Tiling that lifts or grout that disintegrates often indicates water penetration from above or behind. When using inspection cameras or opening small access panels, check pipe joints, trap seals, and fixture mounts for signs of corrosion or movement that create repetitive leaks. Documenting findings and isolating sections of plumbing for pressure testing helps differentiate between intermittent leaks and steady seepage. Properly repairing fixtures and ensuring adequate drainage reduces the likelihood of future hidden leakage.
Maintenance: insulation, airflow, materials, and ongoing inspection
Insulation and appropriate materials inside wall cavities influence how moisture behaves. Cold water pipes without thermal insulation can cause localized condensation; cavities with poor insulation may retain moisture longer, feeding mold and rot. Regular maintenance includes checking fans and ventilation paths, inspecting seals and grout annually, and monitoring humidity with a hygrometer. When repairs are made, choose materials resistant to moisture and mold in wet zones and ensure that airflow paths are not blocked. Periodic inspections—particularly after heavy use or storms—help catch small problems before they become concealed, costly damage.
Conclusion
Finding hidden leaks behind walls depends on careful observation, the right combination of tools, and understanding how moisture, ventilation, and building materials interact. Start with visual signs and humidity readings, use targeted instruments such as moisture meters and thermal cameras to narrow the search, and address compromised grout, sealing, or waterproofing to prevent recurrence. Consistent maintenance of ventilation, drainage, and fixture seals reduces the risk of concealed leakage and limits conditions favorable to mold and mildew.


